1. Introduction
2. Written Skills
 
2.1  Basic Skills
2.2 More Advanced Skills
3. Dictation Skills
 
3.1  Melodic Dictation
3.2 Harmonic Dictation
3.3 Error Detection
4. Keyboard Skills
5. Summary & Conclusions
6. Further Information

Tips on Using Finale


Finale: A Useful Tool for Music Theory Instruction

Stewart Carter, Wake Forest University

1. Introduction
A typical course in music theory for college music majors at the freshman level includes three basic components: written skills (including scales, intervals, chords, and part-writing), aural skills (sight-singing and dictation), and keyboard skills. In some universities all three components are combined in a single course; in others, each component may be allotted to a separate course. Computers can be valuable aids to learning in all three components of music theory instruction.


About the author...


Several software programs designed specifically for music theory are available commercially. Collectively, these programs have certain drawbacks: (1) many are too elementary for a college music theory course, except for the most basic aspects; (2) many are available only for Macintosh platforms; and (3) most do not allow for customization; thus the teacher cannot tailor drills to the individual needs of students and the specific objectives of the course.

Faced with these problems, and with an IBM-based computer music laboratory and a campus computer environment in which every entering student receives an IBM Thinkpad, I set out to develop ways in which I could take advantage of the students' Thinkpads, tailoring supplementary work and certain homework assignments to the needs of my students. I decided to employ Finale to create my own drills and homework exercises.


Acknowledgement
The author wishes to thank Greg Simmons, of Appalachian State University; Kent Williams, of the University of North Carolina-Greensboro; and Brad Maiani, of the University of North Carolina-Chapel Hill, for offering suggestions concerning the exercises that follow.


Finale, a product of Coda Music Technology, is one of the most widely used music notation programs. It is available in versions for both Macintosh and IBM. A very useful 
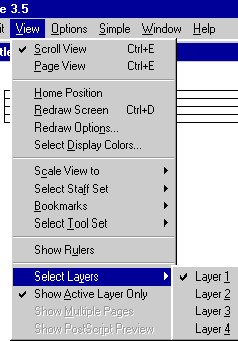
feature of Finale is its capacity for entering musical notation in as many as four different layers, with the capability of viewing any single layer, or all layers, at a time. This capability is of considerable value for drills in music theory. And because Finale also has playback capabilities, written exercises can easily be combined with dictation exercises-a feature of particular value for students with weak keyboard skills.

At Wake Forest University, I can create exercises using Finale, then place them in shared "read-only" folders. Since all Wake Forest students have Thinkpads, and all are connected to the campus computer network, they can open the folders and retrieve assignments. Instructors' comments intended for a specfic student can be delivered via e-mail. On campuses where students will use Finale in a computer laboratory (hopefully with links to electronic keyboards), the shared folders can be set up on the "master" unit, for access by the "slave" units.

Finale is a very comprehensive and complex program, frequently offering multiple paths to accomplish the same task. In the discussion below, I have endeavored to keep instructions as simple as possible. Tips for setting up the exercises are provided in sidebars, but I have not provided a complete manual for preparing them. Teachers who make use of the ideas here must know how to use Finale at a basic level, and probably will need to make use of the manuals or online help menus. Some will undoubtedly discover ways to perform the tasks below more expeditiously. I welcome suggestions for refining or improving these tasks. My e-mail address appears at the end of the article.

While Finale can be used with a MIDI interface, I do not recommend it for first-year music theory students, who are not familiar with MIDI. While the prospect of entering the notation directly from an electronic keyboard might appear to be a time-saver, the task is initially far more difficult than it appears, and is likely to involve a considerable amount of editing.

The examples reproduced below could conceivably be downloaded for classroom use, but that is not their intended function. Rather, they are designed merely as illustrative exercises, demonstrating how the "layer" function can be used by music theory teachers to develop their own drills and exercises.

2. Written Skills
2.1 Basic Skills
One of the simplest and most obvious uses of computers in teaching music theory is in the area of teaching such basic skills as the construction of scales, intervals, and chords. There is an abundance of commercially available software for this kind of instruction, and many teachers may prefer not to devote valuable time to preparation of their own exercises with Finale. Most of the commercial programs can provide instant feedback concerning successful versus unsuccessful responses, and many are capable of keeping records of students' progress. Because of this feature alone, many teachers may wish to use standard commercial software specifically designed for music theory instruction.


On the other hand, the ability to customize instruction has distinct advantages. One teacher might wish to mingle root-position triads with inverted triads at an early stage; another may wish to intermix major and minor scales; yet another may wish to intermix harmonic and melodic intervals, or to use intervals in chains rather than as isolated two-note phenomena. Example 1 illustrates a simple exercise in constructing intervals. Example 1a shows layer 1 only of the exercise, which includes instructions and the lower note of each interval to be constructed. (The layer menu is shown in Figure 1.) Example 1b shows layer 2, which contains the correct upper note for each interval, while Example 1c shows all layers. Note that "answers" are placed in the measure following the problem. This allows students to enter their answers immediately above each note without superimposing their response on a hidden note in a temporarily invisible layer. Alternatively, teachers could enter the upper note of each interval in the same measure as the lower note (but in a different layer), leaving alternate measures blank to allow for student answers. This method has the advantage of allowing for playback of both notes simultaneously. Using the method illustrated in Figure 1, intervals can be played successively only.


Example 1:
: To try a simulated example online.
: To download the example as a Finale file (47KB).

Tip 1: Alternative way of creating Example 1.


Figure 1. Finale menu showing layer options.


With many commercial software programs, the student can proceed from one item to the next, checking answers immediately. Using the procedures outlined above for Finale, this is not practical, since once the student views all layers, solutions to all problems are visible.

From the above it can be seen that exercises for a wide variety of skills are possible -- interval construction, chord construction, scale construction -- virtually any sort of basic drill requiring music notation. Example 2 offers an exercise in chord construction, with instructions only (no notation) in layer 1 (Example 2a) and solutions in layer 2 (Example 2b).

The procedures described for Examples 1 and 2 work best for supplementary exercises, since solutions to problems are available to students. For homework assignments -- those to be marked for a grade -- the teacher could, for example, provide a file containing only the information in Example 1a-layer 1. If the teacher wishes to have an exercise such as the one illustrated in Example 1 available in two forms -- the first as supplementary material, with solutions available to the student, the second as a homework assignment, to be submitted for a grade and with solutions not available to the student -- it is best to construct the homework assignment first, save it, then copy it into a second file, to which layer 2 can be added for the supplementary work.


Example 2:
: To download the example as a Finale file (47KB).

Tip 2: Entering verbal instructions in Finale.


2.2 More Advanced Skills
Finale can also be used for more advanced written work -- as, for example, in the harmonization of chorales. Example 3a shows a figured bass for a four-part chorale. In an exercise such as this, the teacher may prefer not to provide a "solution" -- a realization of the figured bass -- particularly since there is no single "correct" solution. If the teacher wishes to provide an "ideal" realization of the figured bass, this is perhaps best done in a separate file, which the student could view after completing his/her own realization. This approach avoids problems that would result if students tried to enter notes above the bass in layer 1, superimposing them over temporarily invisible notes in layer 2. Example 3b illustrates one possible realization to this figured bass.

The analysis in Example 3 is best entered using the lyrics tool, since this is probably the best way to dispose numerals that must have some sort of vertical alignment.


Example 3:
: To download the example as a Finale file (50KB).

Tip 3: Entering bass figures with the lyric tool.

Tip 4: Entering voices with stems going in the proper direction.

Tip 5: Uisng the lyric tool.


3. Dictation Skills
3.1 Melodic Dictation
Layers can be used for all sorts of dictation exercises. Example 4 shows a melodic dictation exercise. Layer 1 contains key signature, time signature, and the initial note, while layer 2 contains the remainder of the melody. Viewing only layer 1, and using the playback function, students can play the exercise as many times as they wish. Students can notate the four-measure melody in measures 5-8, which are blank, using (and viewing) layer 1 only. After completing their notation of the melody, they can "view all layers," and check their version of the melody against the original. Alternatively, students can notate the melody on a sheet of staff paper. They then check their solution against the original by viewing "all layers." It is important to remember that when printing from Finale, only the layer(s) visible on the screen will print, while when using the "playback" function, all layers play, regardless of whether they are visible on the screen at the time.

The melodic dictation exercise in Example 4 is shorter than those I customarily use. It is presented here by way of example.


Example 4:
: To download the example as a Finale file (47KB).

Tip 6: Stems within one layer.


3.2 Harmonic Dictation
Layers can also be used for harmonic dictation. In Example 5, layer 1 (Example 5a) shows key signature, time signature, number of measures, initial notes in soprano and bass, and the symbol for the first chord. The soprano and tenor voices are in layer 2, and the alto and bass in layer 3 (Example 5b shows all layers). It is not practical to put soprano and alto, or tenor and bass, in the same layer, since voices sharing a staff must have their stems in opposite direction, regardless of the position of the note on the staff. It is much easier to do stems in opposite directions if two different layers are used.

For exercises such as this, I ask students to notate soprano and bass voices, plus roman numerals with figured bass. I do not expect them to notate inner parts; this should be possible, especially once the correct chord symbol is determined, but in my opinion it is too time-consuming, and the exact disposition of inner parts is difficult to determine in a playback mode in which all voices have the same timbre. Two different methods can be used for the student to complete the dictation exercise in Example 5. Perhaps the simplest is to copy the material in Example 5a on a piece of staff paper; or the student could print layer 1, and complete the assignment on the printout (in Finale, only the layer that is visible on the screen will print). Another method is to include in one file only the material seen in Example 5a; the complete chorale, as seen in Example 5b, would be available only in a separate file. In this way, students can complete the assignment in the original file, which contains only the template, and compare their solutions to the completed version, found in a separate file.

Electronic dictation assignments are best adapted for use as supplementary material, rather than required work. Obviously, if the electronic files are available to students online, they can play them as many times as they wish, and the teacher has no control over when students compare their work to the completed exercise. The sound produced by most PCs is not particularly attractive, but many students will be able to hook up their computers to external speakers, either in their own rooms or in a computer lab.


Example 5:
: To download the example as a Finale file (50KB).


3.3 Error Detection
Another type of dictation exercise that can be facilitated using Finale is error detection. This is not actually a different type of dictation, but rather an alternative method for accomplishing standard types of dictation, such as melodic and harmonic. In Example 6, two different versions of the same melody are notated, one in layer 1 (Example 6a), the other in layer 2 (Example 6b, measures 9-16). Students play measures 1-8, version 1 of the melody, then compare it to measures 9-16, version 2, which, of course, does not appear on the screen during playback as long as students view layer 1 only. Students may stop after hearing and viewing measures 1-8 and replay them, or proceed directly to the "incorrect" version. Students can complete the exercise in a variety of ways. Perhaps the simplest method is to notate corrections on a piece of staff paper; alternatively, students can make corrections to version 1 on-screen, then view "all layers" to check their solution. The error detection method can be applied to other types of dictation as well.


Example 6:
: To download the example as a Finale file (49KB).

Tip 7: Creating a melody using the mass mover tool.


4. Keyboard Skills
Finale can be used for keyboard drills as well. In the computer music laboratory at Wake Forest, there are eleven "slave" units, each consisting of a Korg keyboard hooked up to an IBM computer, linked to the university's computer network. The eleven "slave" units are controlled by a "master" unit. Keyboard assignments can be placed in shared folders, from which students can copy the assignments, practice, and perform them. My freshman music theory class meets in the keyboard laboratory one day each week. In the first keyboard session in Music Theory I, I try to identify students with weak keyboard skills in order to teach them fundamental hand positions for chords. This helps them to perform the four-part chorale exercises that will begin in the third or fourth week of the semester. A simple drill for learning hand positions is shown in Example 7. Roots of triads are shown in layer 1. The student is instructed to play each triad in four voices (root position, root doubled), first with root in soprano, then third in soprano, then fifth in soprano. The student can check his/her work by opening layer 2 to view the "correct" hand positions.


Example 7:

: To download the example as a Finale file (48KB).


One of my principal objectives in keyboard class is to reinforce concepts and skills presented in the "written skills" portion of the class. Chorale harmonization is an important aspect of these skills, and thus a considerable amount of time in keyboard class is devoted to it. An exercise such as the one shown in Example 3 can also be used in the keyboard portion of the course: students open the exercise in Finale, viewing only the figured bass in layer 1. After preparing their own realization on the keyboard, they can check their own work against the "ideal" realization shown in the other layers.

Finale's transposition feature can also be of value in keyboard class. For my students, a weekly keyboard assignment often includes transposition of a chord progression or melody. Students experiencing difficulties with transposition can transpose the exercise with the help of Finale. This can be a valuable means of checking their work, though it could defeat the purpose of the assignment -- mental transposition of the exercise -- if overused.

Finale used in conjunction with an electronic keyboard in the computer music laboratory can facilitate exercises in improvisation. Example 8 illustrates an improvisatory exercise in which the student must create a treble part over the given bass in what I call "duet" style. While the ultimate goal of an exercise such as this is for the student to play both the given and the improvised part, the "playback" feature of Finale allows an intermediate step, sounding the bass line and allowing the student to concentrate on the improvised upper voice. (No "ideal realization" of Example 8 is provided here.)


Example 8:
: To download the example as a Finale file (47KB).


5. Summary and Conclusions
Since the exercises described above require students to use Finale, the theory teacher will, of course, have to devote a certain amount of instruction time to that purpose. I believe it is possible, however, to teach students the basics of Finale without devoting an undue amount of time to it. One could easily devote a semester-long course to the finer points of this program, but I think that today's computer-literate students can become sufficiently proficient in a few hours of practice to complete the exercises illustrated above. Students can learn many of the features of the program on their own, through Finale's tutorial exercises. At a school such as Wake Forest, where all students own IBM Thinkpads, students can bring their machines to class for group instruction in Finale. On campuses where students do not own individual machines, class time in the computer laboratory must be scheduled. Students who are motivated to do so can learn the finer points of Finale on their own. And serious music students will surely find that knowledge of Finale is of considerable value throughout their musical careers. Electronic music notation programs will certainly change over time, but students who are familiar with current technology should be well equipped to adapt to new developments.

The enterprising music theory instructor undoubtedly will be able to devise many other ways of using layers in Finale as an aid to instruction. Rhythmic dictation could easily be done in this way, as can other types of dictation. The advantage this method offers is that teachers can tailor drills and assignments to the needs of their course, and even the individual needs of their students.

While the exercises presented here are primarily designed to supplement more traditional approaches to music theory, centered around a textbook, a logical next step is the preparation of an electronic course, with all material and exercises created electronically. The potential advantages of an electronic course are great, but, in my opinion, music students will always need to know how to notate music manually. It is an important skill, which should be developed even in an electronically based course of instruction.


6. Further Information
Finale is produced by Coda Music Technology. Coda can be reached by e-mail at finalesales@codamusic.com.

The author welcomes comments and suggestions regarding the exercises and methods described above. Please contact the author at carter@wfu.edu.


********** End of Document **********


IMEJ multimedia team member assigned to this paper Yue-Ling Wong